

You find a 3D LUT that suits the opening shot, apply it across the sequence, and the second clip looks wrong. The third one is worse again. Nothing about the file changed between them, which is exactly the point.
A lookup table performs the same conversion every time it runs, so the difference lies in what you handed it. This guide covers why footage varies from clip to clip and how to bring shots closer together in the Filmora desktop video editor before the look goes on. It also covers how to recognize when the preset itself is the problem.
Part 1. The Input Footage Determines the Result
Two clips can take the same 3D LUT in very different directions. One may look balanced straight away, while the other turns too dark, warm, or saturated because it started with different image values. These 6 factors usually explain why:
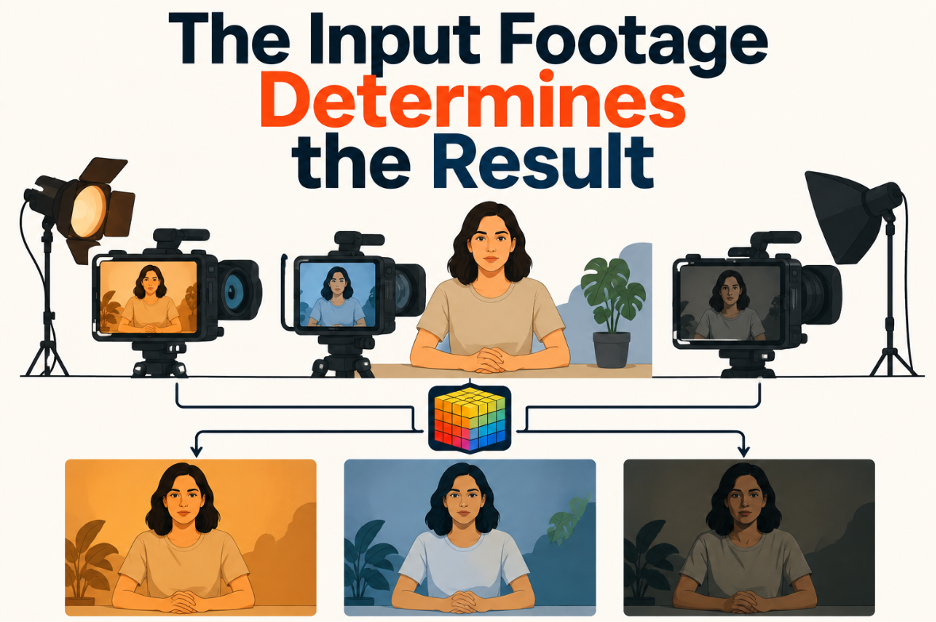
- Camera and Phone Color Processing: Different manufacturers process color in their own way, so the same scene can produce different starting values.
- Picture Profile or Log Recording: Log and flat profiles begin with lower contrast and saturation than standard footage, changing how strongly a preset affects them.
- Incorrect White Balance: A daylight setting used indoors can make footage start too warm, and the preset may exaggerate that cast.
- Uneven Exposure Between Clips: An underexposed shot contains less usable shadow detail, making dark areas easier to crush after the preset is applied.
- Mixed Lighting Conditions: Daylight, tungsten bulbs, and LED panels can give skin tones and other colors very different starting points.
- SDR and HDR Source Differences: HDR footage contains a wider range of brightness and color information, so it may respond poorly to a preset designed for standard footage.
Part 2. Identify the Type of Mismatch
Naming the fault is quicker than experimenting, because each kind points at a different correction. Compare the odd clip against the shot you are happy with, then match what you see against this list before touching the 3D LUT:
| What You See | What It Usually Means |
| One Shot Looks Noticeably Warm | White balance differed when the clip was recorded |
| One Shot Looks Noticeably Cool | White balance shifted in the opposite direction |
| One Shot Looks Darker Than the Rest | Exposure was lower before anything was applied |
| Colors Look Too Intense | The clip started with more saturation than the reference |
| Footage Looks Flat or Washed Out | Log footage may not have been converted first |
| Skin Tones Differ Between Shots | 2 cameras may be interpreting the same skin tones differently |
Note which clips show each issue. In most sequences, only a few shots need correction, so fixing those individually is faster than re-grading the entire timeline.
Part 3. Turn Off the LUT and Correct the Base Clip
Correcting a clip while a preset sits on top of it means judging two changes at once. Turn off the preset first and correct the footage underneath. With Filmora 3D LUT controls, you can then restore the look and check how it responds to the corrected base clip.
Step 1. Disable the LUT on the Problem Clip
Select the clip, open the “Color” tab and the “Basic” section, and disable the “LUT” toggle. You are now looking at the footage as recorded.
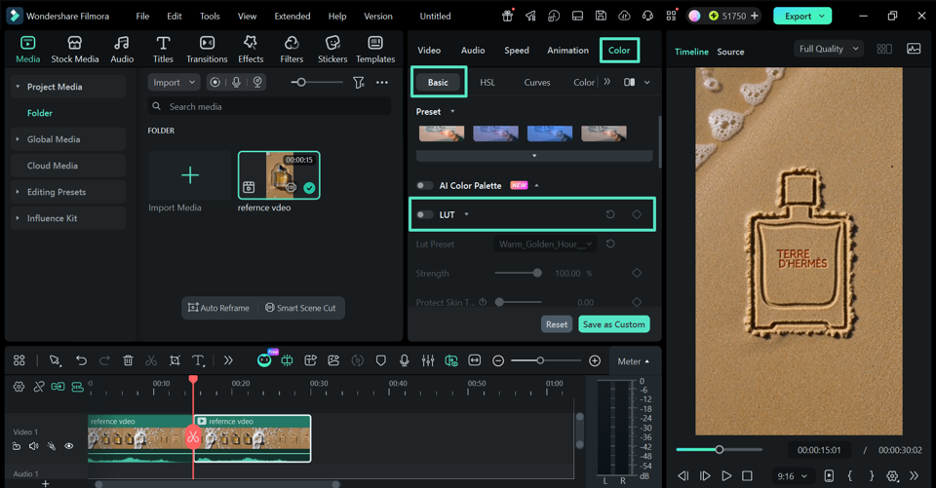
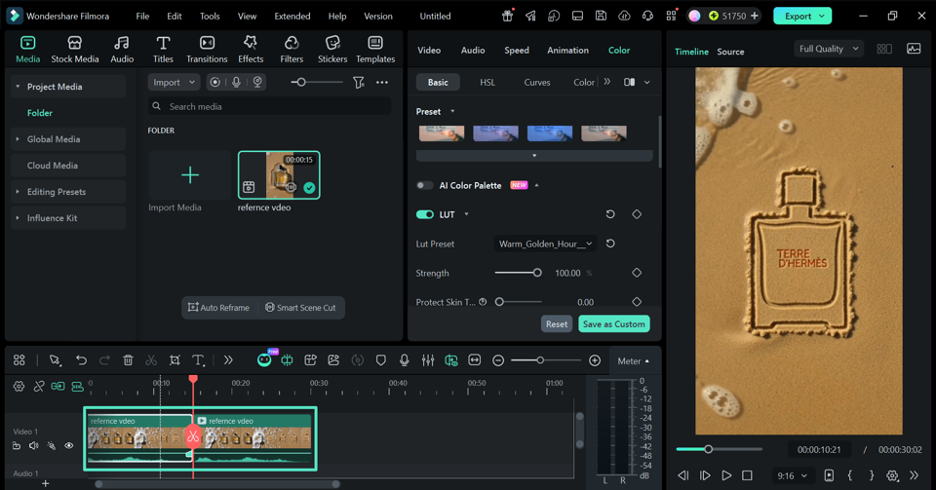
Step 2. Put It Beside Your Reference Shot
Choose the “Clip” that already looks right and compare the two directly. Everything that follows is about closing the gap between them, not about reaching some abstract ideal.
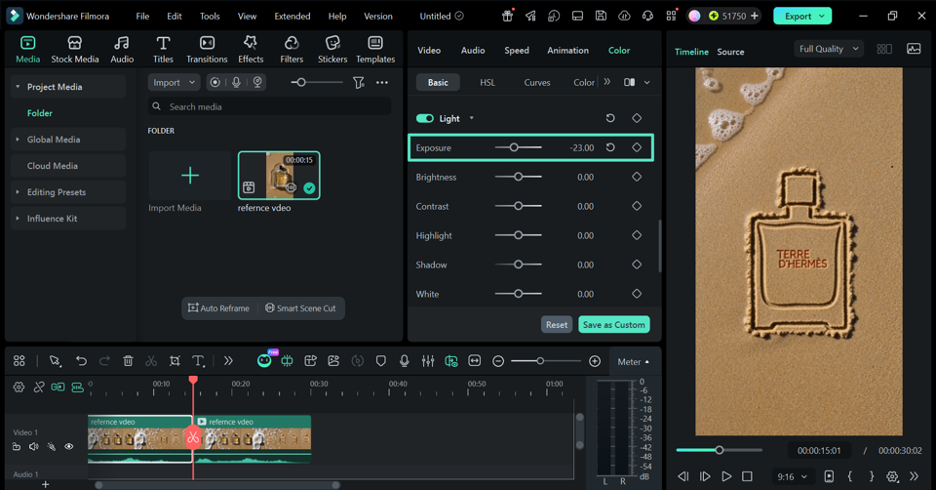
Step 3. Fix Exposure First
Match the clip’s “Exposure” to your reference before adjusting anything else. If one shot is noticeably brighter or darker, it becomes harder to judge color and contrast accurately across the sequence.
Step 4. Fix White Balance Next
Adjust “Temperature” and “Tint” until a white or gray object reads as neutral. This is usually the single change that brings a stubborn clip into line.
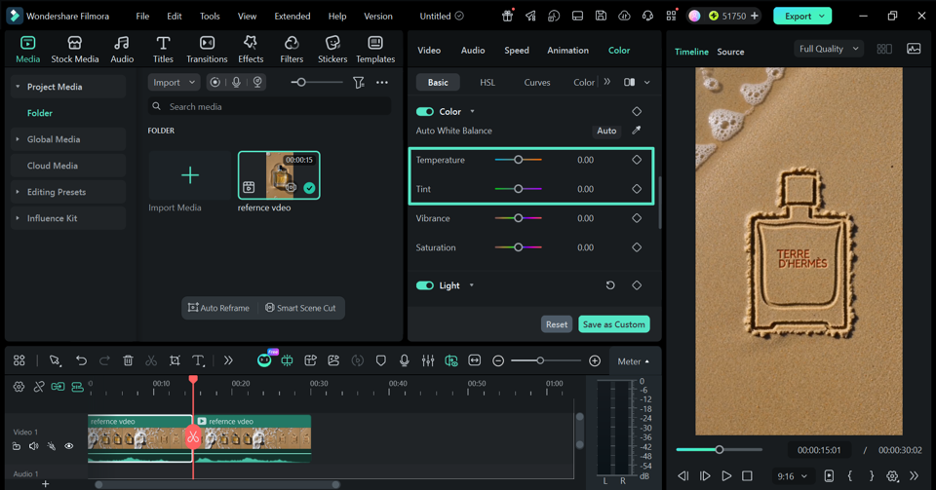
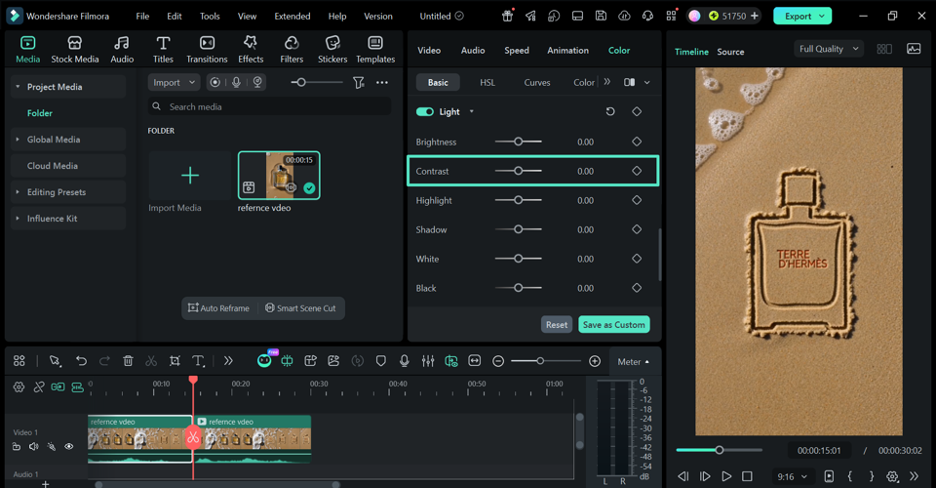
Step 5. Check Contrast and Saturation, Then Re-enable
Bring the “Contrast” and “Saturation” closer to the reference shot before turning the preset back on. The two clips should now respond more consistently and match more closely.
Note: Filmora’s AI Color Palette can do much of this automatically. Pick a reference frame, generate the palette, and set the match strength between zero and one hundred, with skin tone protection available inside the same panel.
Part 4. Adjust LUT Strength Separately for Each Clip
A 3D LUT Filmora workflow gives you room to vary the preset strength from one clip to another instead of forcing a single value across the project. Here is why per-clip control matters and when lowering the strength can produce a better match:
Strength Is a Per-Clip Setting
The 3D LUT Filmora setting applied to one clip can use a different strength on the next, and often should. Two shots that start differently may need different amounts of the same look to match consistently.
Where a Lower Value Helps
A clip that is already contrasty, warm, or saturated usually needs less of the preset than a flatter shot. Lower the Strength on the problem clip rather than increasing it on the others, as this helps preserve detail.
Part 5. Check People, Products, and Neutral Objects
Once the 3D LUT is applied, do not rely on the overall look alone to decide whether clips match. Familiar subjects and colors make inconsistencies much easier to spot, so use these visual references when comparing shots:

- Skin Tones on Faces and Hands: Viewers are highly sensitive to skin color, making even small differences between clips easy to notice.
- Color Casts in Neutral Areas: White clothing, gray walls, and other neutral surfaces make warm, cool, green, or magenta shifts easier to catch.
- Shifts in Brand and Product Colors: Logos, labels, and packaging provide a familiar reference, so unexpected color changes between shots stand out quickly.
- Unnatural Color Changes in Food: Familiar ingredients make unusual green, gray, or overly warm tones easier to recognize.
- Inconsistent Greens and Blues Outdoors: Trees, grass, and skies can change noticeably under a strong preset, revealing differences between outdoor shots.
Part 6. Know When the LUT Is the Wrong Choice
Sometimes the 3D LUT is the problem, not the clip. If ordinary corrections still cannot get the shot where it needs to be, there is little value in forcing it. The table below helps show when a preset is worth keeping and when it is better replaced. For more on preparing the footage itself, see the Filmora color correction guide.
| Worth Correcting | Time to Replace the Preset |
| The differences are exposure or white balance | It expects a different input profile entirely |
| A modest adjustment brings the shot into line | Only extreme compensation gets anywhere close |
| Skin looks natural once the base is fixed | Skin stays wrong however the clip is adjusted |
| Brand and product colors survive intact | Important colors shift away from their reference |
| Detail holds at both ends of the range | Highlights or shadows lose texture permanently |
| Shots unify after reasonable work | Shots still refuse to match one another |
If your footage consistently falls into the right column, the LUT was likely designed for a different type of input. Choosing a better-matched preset is usually more efficient than compensating for the same problems on every clip.
Conclusion
Consistent color starts with correcting each clip before applying a 3D LUT. Exposure, white balance, and saturation should share a similar baseline before the final look goes on. Filmora makes this easier by keeping color correction and LUT controls together, so you can balance individual shots and maintain a more unified look across the sequence.