
I didn’t start thinking seriously about Excel encryption until I realized how often spreadsheets travel beyond my control. A file gets emailed. Someone downloads it. A copy ends up saved locally. At that point, access is no longer limited to the original recipient. That’s when I started asking myself a simple question: how do I encrypt an Excel file in a way that actually protects the data inside it? Excel offers some built-in options, and they work to a point. But after handling more sensitive files, I learned their limits and adjusted how I protect spreadsheets before sharing them.
How Do I Encrypt an Excel File Using Excel’s Built-In Options
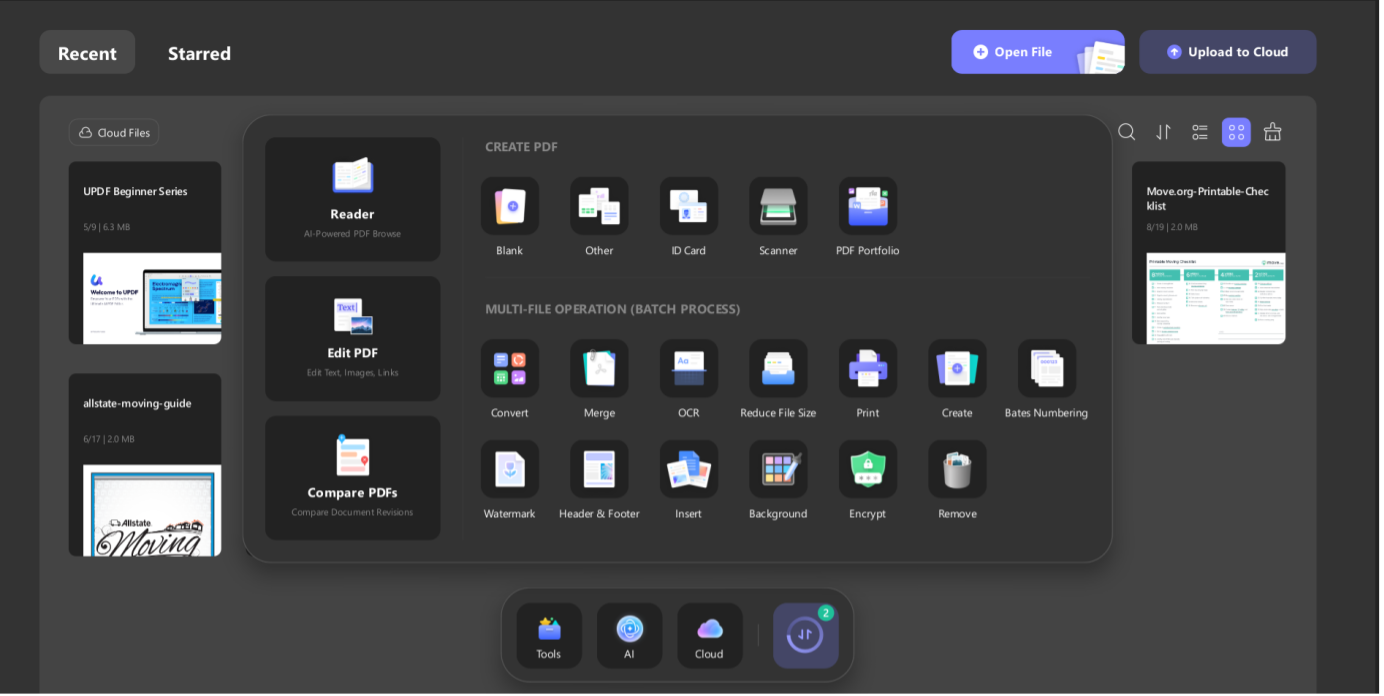
Excel includes several security features, and I still use them in certain situations. They’re convenient because they don’t require extra software and can be applied quickly.
Encrypt An Excel File with a Password
This is the most direct way to encrypt a file in Excel.
Steps I follow:
- Open the Excel file.
- Click File, then Info.
- Select Protect Workbook.

- Choose Encrypt with Password.
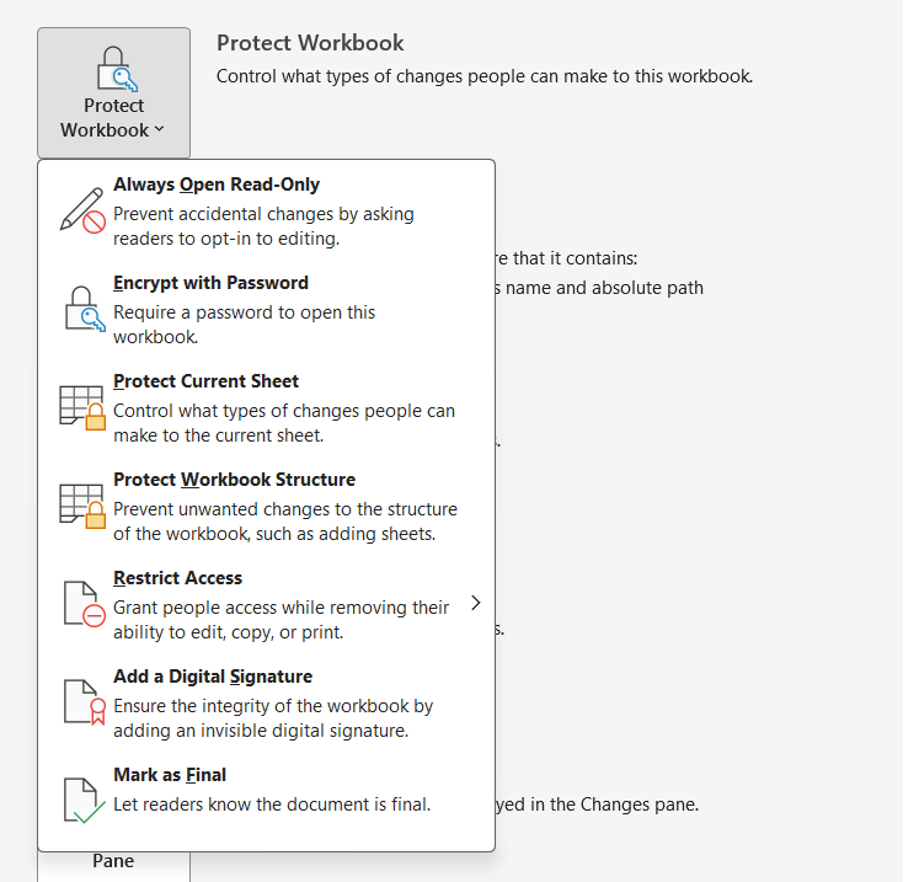
- Enter a password and confirm it.
- Save the file.
This method encrypts the file so it cannot be opened without the password. It’s effective for basic protection, especially when sharing files internally. The main drawback is password handling. Once the password is shared, there’s no control over how it’s stored or reused.
Protect Workbook Structure
Sometimes encryption isn’t my main concern. I just want to prevent changes to the file structure.
Steps:
- Open the workbook.
- Go to the Review
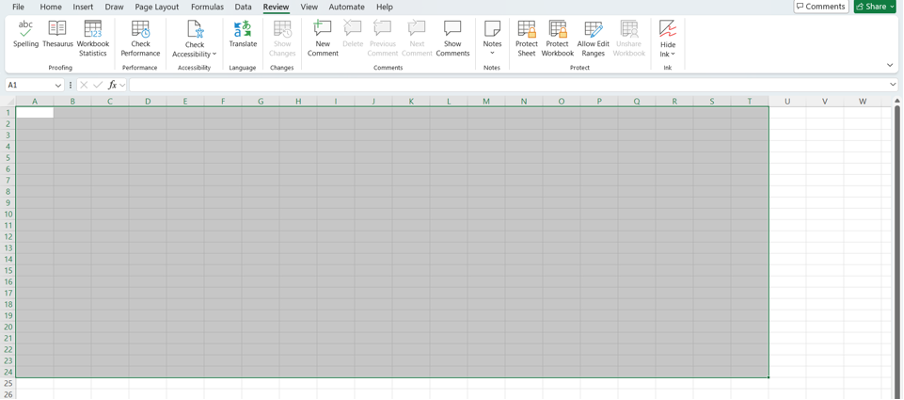
- Click Protect Workbook.
- Set a password.
This prevents sheets from being added, removed, or renamed. It does not encrypt the file contents, so it’s more about organization than security.
Protect Individual Worksheets
This option is useful when collaboration is involved.
Steps:
- Select the worksheet.
- Go to Review.

- Click Protect Sheet.
- Choose allowed actions and set a password.
This controls editing but doesn’t encrypt the file. Anyone with access can still open and copy the data.
After using these options for a while, I realized they answer how to encrypt excel file only at a surface level. They work, but they rely heavily on password discipline and don’t offer strong control once the file leaves my system.
Why I Started Using a Third-Party Tool Instead
As soon as I started working with financial data and internal reports, Excel’s built-in tools felt limiting. I wanted stronger encryption, clearer permission control, and better compatibility across devices.
That’s when I began converting Excel files to PDF and encrypting them instead. PDFs offer stronger encryption standards and behave consistently no matter where they’re opened.
This is where UPDF became part of my workflow. Rather than encrypting Excel directly, I convert the spreadsheet into a PDF and apply encryption there.
UPDF uses modern encryption methods and allows me to:
- Set open passwords
- Restrict printing or copying
- Apply encryption to multiple files at once
- Access files securely across devices
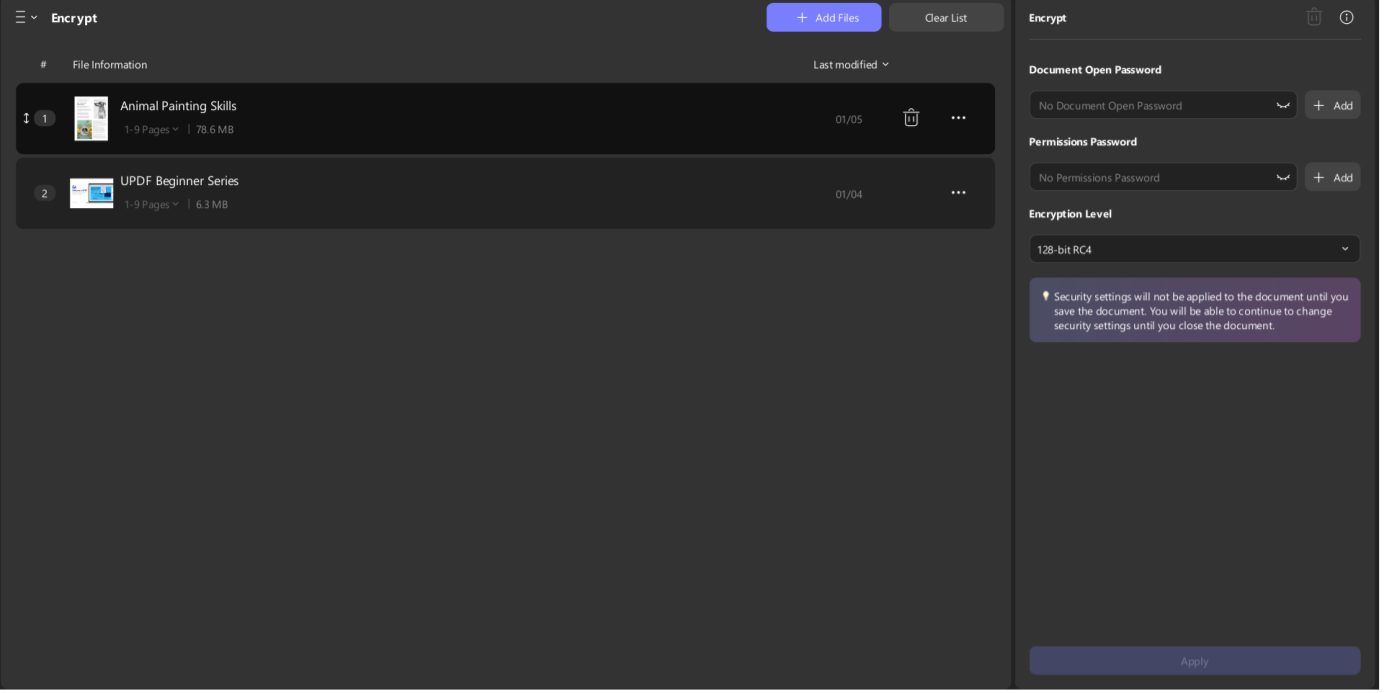
How I Encrypt an Excel File Using UPDF
Encrypting A Single Excel File
This is what I do when handling individual spreadsheets.
Steps:
- Open UPDF on my computer.
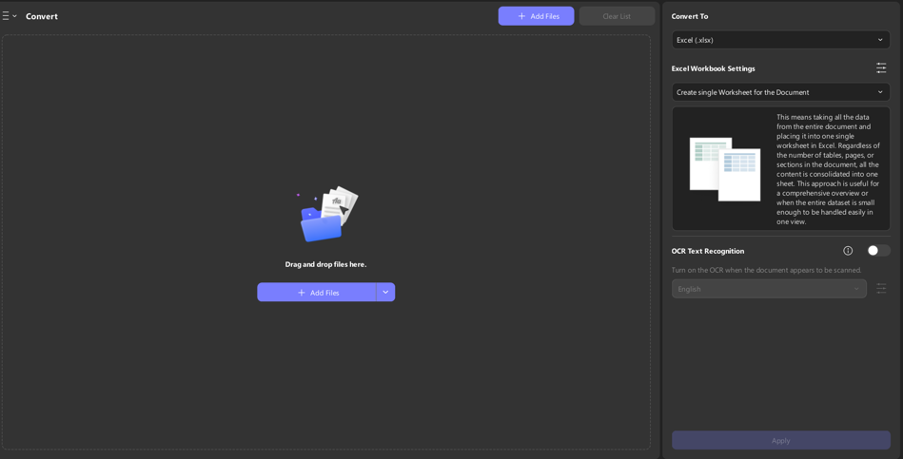
- Convert the Excel file to PDF using UPDF’s conversion tools.
- Open the converted PDF.
- Click Protect.
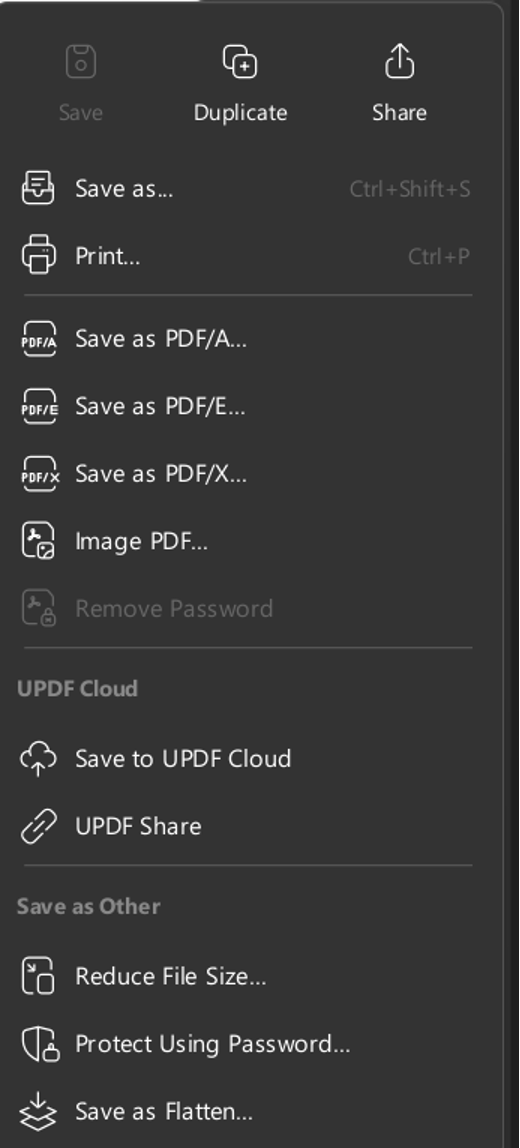
- Select Encrypt.
- Set an open password or permission password.
- Save the encrypted file.
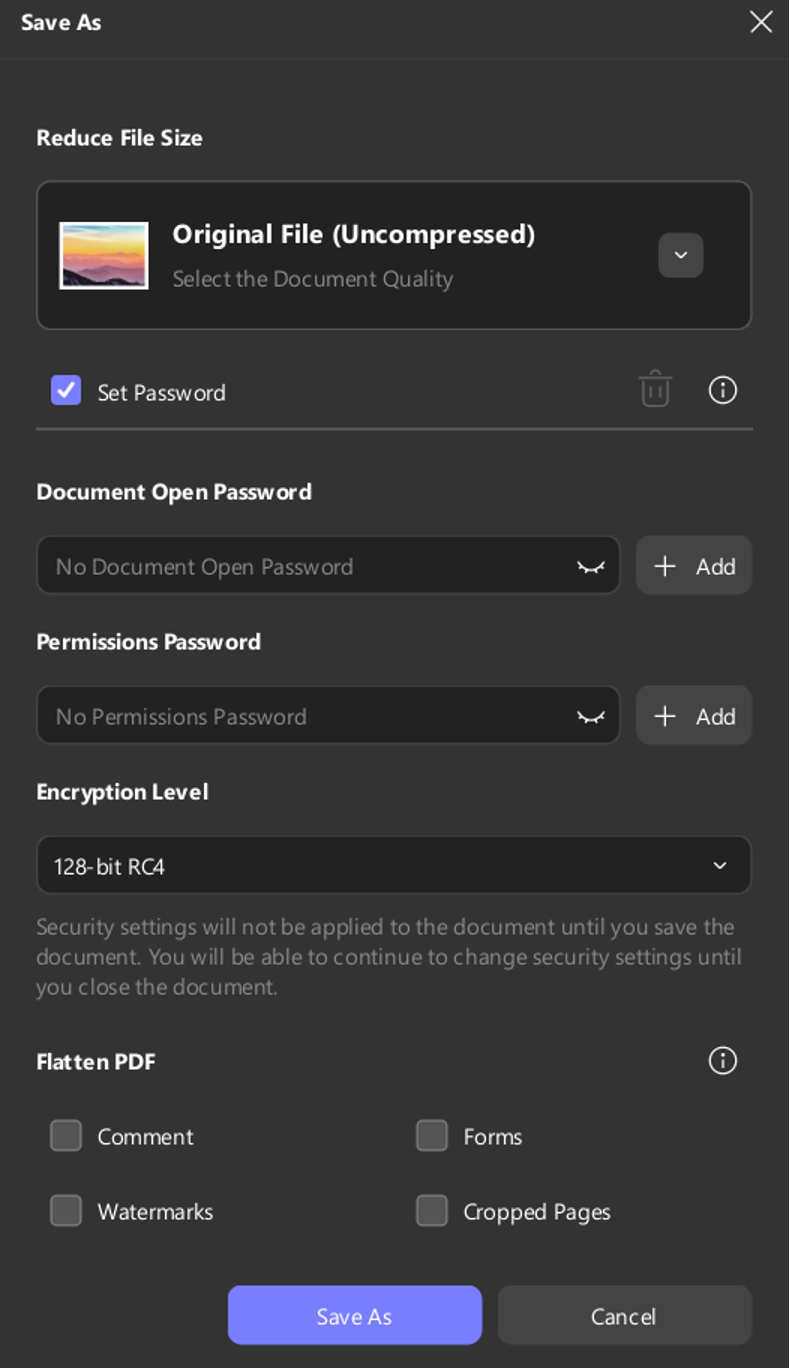
Once encrypted, the file cannot be opened or modified without authorization. The formatting remains intact, which is important for reports and financial documents.
Encrypting Multiple Excel Files At Once
When I’m dealing with many spreadsheets, this saves a lot of time.
Steps:
- Open UPDF.
- Convert all Excel files into PDFs.
- Open Batch Processing.
- Choose Encrypt.

- Add the converted PDFs.
- Set encryption rules.
- Apply and save.
Unlike Excel, UPDF offers batch encryption, so this approach fills a major gap.
Why PDF Encryption Works Better For Me
Once an Excel file becomes a PDF, it’s harder to modify accidentally. The structure is locked, formulas aren’t exposed, and encryption applies to the entire document.
I’ve also found PDFs easier to manage across systems. Whether someone opens the file on Windows, macOS, or mobile, the security settings stay consistent.
UPDF also lets me store encrypted files in the cloud, which means I don’t need to rely on email attachments or unsecured storage. That alone reduced the risk of files being shared unintentionally.
Things I Keep in Mind When Encrypting Files
Encryption is only as good as how it’s used. Over time, I’ve picked up a few habits.
I avoid reusing passwords. I don’t store passwords inside the same folder as the file. I also avoid sending passwords in the same message as the encrypted file.
I also think about the file’s purpose. If collaboration is needed, encryption might slow things down. In those cases, I limit encryption to final versions only.
Why I Upgraded UPDF
I started with the free version, but limitations became noticeable once I needed batch processing and unrestricted encryption.
Beyond encryption, UPDF replaced several tools I used before:
- PDF editing for small text fixes
- OCR for scanned spreadsheets
- File conversion without layout loss
- Page organization and compression
- Annotation for review cycles
Having one tool handle all of that simplified my workflow.
Conclusion
Learning how to encrypt an Excel file changed how I treat spreadsheets. Excel’s built-in tools are fine for basic protection, but they don’t offer long-term control once files are shared. Converting Excel files to PDF and encrypting them with UPDF gave me stronger security, better consistency, and fewer worries about unauthorized access. When the data matters, I no longer rely on Excel alone.
